Installing a 100 amp Service-Upgrading Electrical Services in a Duplex: What You Need to Know
Hello everyone! Today, we’re diving into electrical service upgrades. This post is for informational and entertainment purposes only and outlines how we typically handle service upgrades. If you’re preparing for an upgrade or trying to understand what your electrician is doing, this will give you a clear picture of the process.
The Starting Point: Old Duplex, Old Service
We started with an older duplex property that had two 60-amp services—something that’s well below current standards. Here where we are, the minimum required service is 100 amps per unit, with 200 amps being preferred.
The Upgrade Plan
Our plan involved installing a single 200-amp service which then splits into two 100-amp per-position meter bases—one for each unit. Each of these then feeds into its own 100-amp panel inside.
- The main service conduit is 2 inches.
- The conductors are 250 kcmil (or MCM in the U.S.) aluminum.
- We offset the top of the conduit to move the meter away from a window, which is required by code in our area.
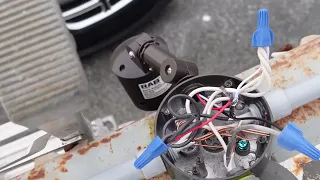
Meter Base and Grounding
Each meter base houses a 100-amp position. Inside, we installed:
- Inch-and-a-quarter conduit to run from the meter to each panel.
- A main grounding wire coming up from a ground plate to the first point of neutral connection (the meter base, in this case).
This is required by code where we are: the system ground must bond to the first point of neutral connection.
Inside the Basement: Disconnects and Panels
Down in the basement, code requires that no more than 10 feet of service entrance cable can be run inside the building without a disconnect. Since we exceeded that, we installed a disconnect switch before the panel.
- The service cable (aluminum #1) enters the disconnect.
- From there, we transition to #3 copper MD90 to go into the panel.
- We use aluminum for cost-efficiency, but code mandates copper under certain conditions or allows the transition, which we’ve done here.
We’re replacing the old 60-amp panels with new 100-amp Square D panels. That means a full teardown and rewire:
- Power utility shuts down the old 60-amp service.
- Two crews remove both old panels.
- All wires are marked for reconnection.
- New panels are mounted and connected to the upgraded feeds.
Inspections and Reconnection
After the new panels are installed, the local inspection authority checks all work. Once approved, the power utility reconnects service to the new 200-amp supply and 100-amp panels.
The Finished Product
The meters are now mounted on the new 100-amp per-position bases, and the utility has completed the hookup. Each unit now has:
- A 100-amp disconnect
- A fully upgraded panel
- Labeled breakers
- Up-to-date grounding and code compliance
Everything is tied in, clean, and ready to go.
Final Thoughts
This kind of upgrade is a big job but well worth the effort to bring your property up to modern electrical code—and improve safety and capacity.
Don’t forget to like and subscribe to stay updated on our latest electrical tips and walkthroughs.