Mistakes DIYers Make When Connecting Wires Together A How To With Pro Tips
In today’s guide, we’re covering one of the most fundamental — yet often misunderstood — parts of residential electrical work: connecting wires together. While there are already some good tutorials online, we’re going to show you how certified electricians do it, with a few pro tips that can make your connections more secure and your work more efficient.
What You’ll Need
Before we begin, make sure you have:
- Wire strippers
- Linesman pliers
- 14-gauge wires
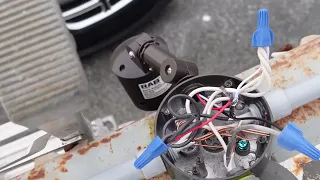
- Wire connectors (also known as marettes or wire nuts)
The Basics of Wire Connection
We’re working with 14-gauge wires, commonly used for residential circuits. First, we strip the insulation back — typically about three-quarters of an inch for a standard connection. But when making multiple connections, we strip back further, about 1¼ inches, to give ourselves more wire to work with.
Some may wonder: Why use linesman pliers instead of wire strippers? That comes down to experience. On a job site, we often don’t want to carry extra tools. A good pair of sharp linesman pliers can easily and cleanly strip wires with the right technique.
Standard Wire Connection
Let’s start with a basic connection:
- Strip the wires back about ¾ inch.
- Align the wires so the insulation ends line up evenly.
- Twist them clockwise using your linesman pliers, starting at the tip and working down.
- Once they’re twisted, cut off the sharp point at the end to clean it up.
- Install the wire connector, turning it as tight as possible by hand.
- Finish it off with a final twist or two using your pliers.
This creates a solid connection that won’t come apart — exactly what you want in any junction or switch box.
Pro Tip: How to Handle Multiple Wires
When you’re dealing with multiple wires — say five or six in one box — it gets more challenging. Here’s how to handle those:
- Strip the wires back about 1¼ inches.
- Stagger the wires slightly — offset each one about 1/16 inch from the next. This prevents the bundle from becoming too thick at one point and allows the wires to mesh together better.
- Align the wires in a tapered formation before twisting.
- Twist clockwise with your linesman pliers, starting at the ends and working your way in.
Here comes the pro secret:
When you trim the end of your twisted wires, don’t cut it flat. Instead, cut it at a 45-degree angle.
Why? That angled tip helps the wire connector bite down more securely, especially with staggered wires. A flat cut can sometimes cause uneven pressure inside the connector, which risks a loose or unsafe connection.
Once the wire connector is on, give it a final twist with your pliers to lock everything in. You’ll often see the connector bulge slightly — that’s good! It means it’s fully engaged.
Why It Matters
Every wire in the bundle must have equal contact inside the connector. If a wire is set too far back and doesn’t touch the others properly, it can result in:
- Arcing
- Heat build-up
- Potential fire hazards
This is especially critical in multi-gang boxes, where space is tight and connections need to be flawless.
Final Thoughts
There’s technically no “wrong” way to connect wires if you follow code, but the little pro touches we shared — staggering, angling the cut, pre-twisting — can make a big difference in performance and safety.
These small habits come from years of field experience and are how professional electricians ensure reliable connections every time.
Like What You See?
That’s today’s pro tip on how to make solid wire connections with a wire nut or marette.
If you found it helpful, don’t forget to like, subscribe, and stay tuned for the next video!